Sunday, May 17, 2015

How to Roast a Chicken Perfectly


When I first started cooking years ago the thought of roasting a chicken was intimidating to me. I researched many recipes and tried and failed many times until I came up with this fool proof recipe on how to perfectly roast a chicken.  
I often make this chicken on Sunday afternoons so that I can make several different meals for the week ahead.  Today we are having the chicken with brown butter skillet corn from Barefoot in the Kitchen's blog (link below) and roasted potatoes.  I will trim off the leftover meat this evening and make homemade chicken broth with the carcass for chicken noodle soup later in the week and hopefully, I can also get a batch of chicken salad out of it as well.  The chicken is 6 pounds at 95 cents a pound so for under $6 I am making 3 meals! 

Roasted Chicken
  • 1 roasting chicken (5-6 pounds) 
  • Kosher salt 
  • Freshly ground black pepper 
  • 2 sprigs of fresh rosemary
  • 1 lemon, quartered 
  • 1 head garlic, cut in half crosswise 
  • 4 tablespoons (1/2 stick) butter, melted 
  • 1/2 yellow onion, cut in half again 


Preheat oven to 425 degrees.
Brown Butter Skillet Corn

Remove the chicken giblets from the inside of the chicken. Rinse the chicken inside and out. Liberally salt and pepper the inside of the chicken. Stuff the cavity with the bunch of rosemary, quarters of lemon, and all the garlic and onion. Brush the outside of the chicken with the butter and sprinkle again with salt and pepper. Tie the legs together with kitchen string and tuck the wing tips under the body of the chicken.

Roast the chicken for 1 1/2 hours, or until the juices run clear when you cut between a leg and thigh. Remove the chicken and place on a platter and cover with aluminum foil for about 20 minutes. Slice the chicken.  This chicken goes well with the Brown Butter Skillet corn(link below).  Enjoy!
Brown Butter Skillet Corn recipe:  

Sunday, April 26, 2015

Pantry Organization

When it comes to preparing meals and snacks for your family having an organized pantry to be able to make the whole process easier, faster, and more efficient is so important.
Often people think that they will need to spend a lot of money to set up an organized pantry system.  I am here to tell you that you do not have to buy expensive organizing products to create an organized pantry.  I've organized my entire pantry by using things that I already had in my home and a few things that I had to purchase from Walmart, Michael's and The Dollar Tree.  Every item purchased was under $5 a piece!   I’m going to show you all the cool systems that I set up to inspire you to organize your pantry with whatever budget you are working with.


This is my pantry.  It is the narrow cabinet system on the left side of my refrigerator.  It is deep and narrow, only about 16 inches wide so it is a bit of a challenge to figure out a good working system!  In the photos below you will see what the pantry looked like before.  It was pretty bad!!


The first thing that I did was to empty all of the shelves and wipe them down with an all-purpose cleaner, making sure to dry them well.


The next step was gathering all the containers and organizers that I had around the house or that I purchased.  I have several baskets from Target that I already own (blue and wicker), the canisters are from Walmart and they are the Better Homes and Garden brand.  I also purchased labels and a basket at 50% off from Michael's.  The tiered wooden piece is from Marshall's and that is actually being used for my spice cabinet along with the cake pans and marbles (more on that in another post!).


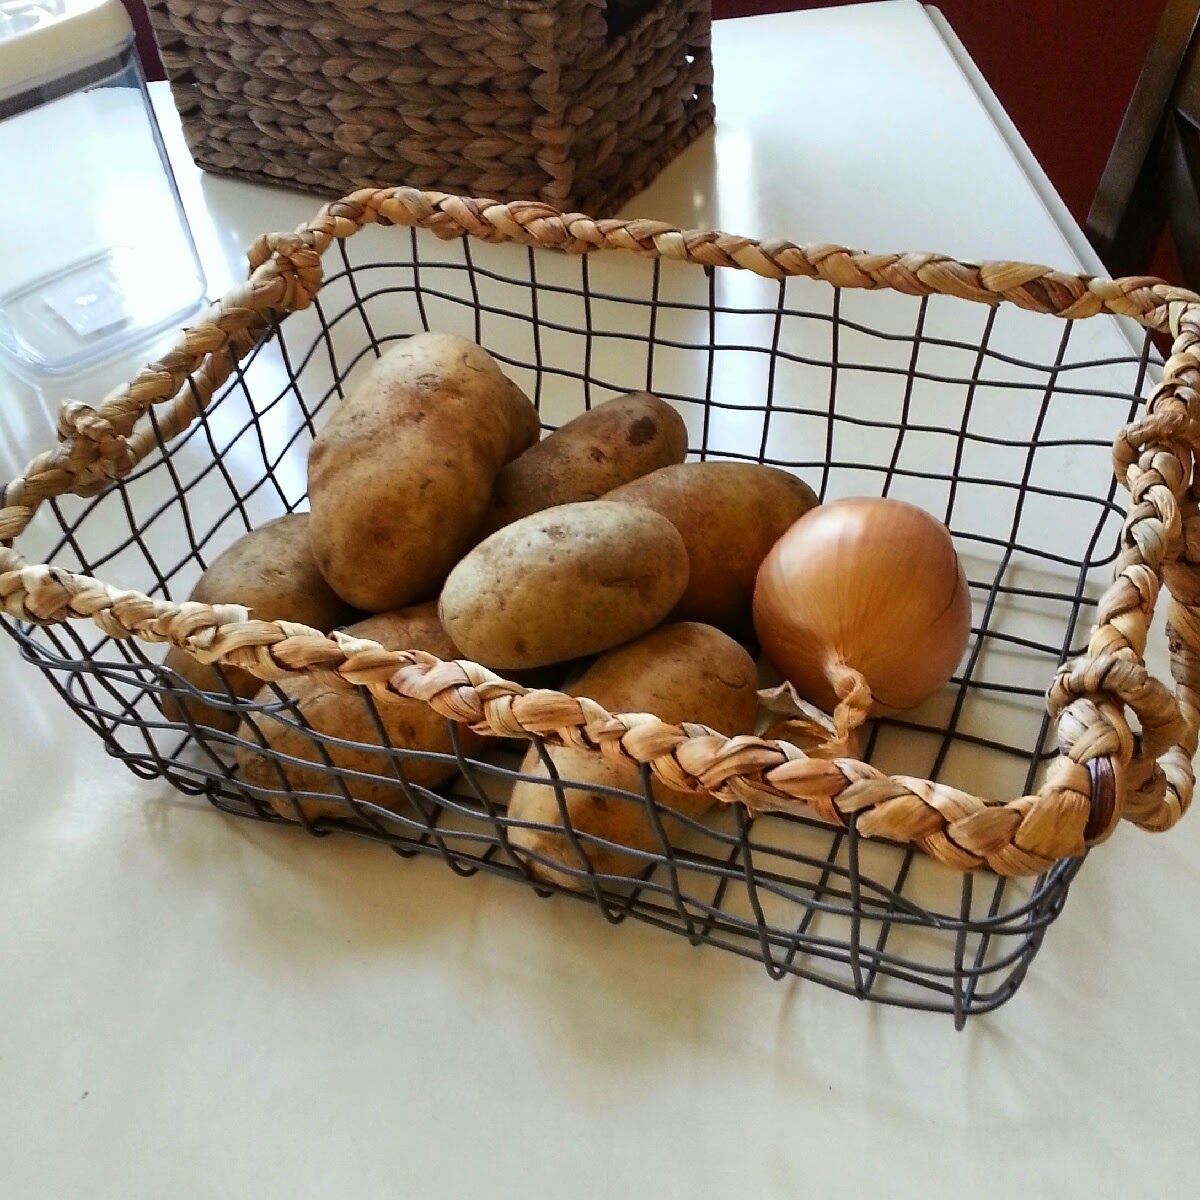
I used this open air basket to store my potatoes and onions.


The larger blue basket is for storing all of my chips.  I use clips that I love from The Dollar Tree.  They are fun and come in a rainbow of colors!


The smaller blue basket stores all my son's snacks such as granola bars, cereal bars and popcorn.  This way whenever he is hungry he knows that this bin is his and can just grab something quickly without having to dig through the pantry.


This wicker basket holds miscellaneous stuff like canned fish, dried fruit, rice cakes, seeds etc.


I used my label maker and these cute black labels from Michael's to create labels for my canisters.  I love to store all of my dry goods like, pasta, nuts, grains, flour, sugar, rice, oats etc in these canisters.  It makes it easy to find and the seal tight containers help keep them fresh.


Here is the top shelf after picture.  I store my paper towels, dog food and granola on this shelf.  The extra dog food is behind this.  My shelves are deep so it allows me to store the extra items that are used to refill behind the items that are stored in the front of the shelf.


The next shelf is my chip basket and a container of trail mix that I make weekly as a healthy snack for lunches.  It is Trader Joe's raw almonds and cashews, dried cranberries and dark chocolate chips.  My husband and son love this mix!


The next shelf stores our canned goods.  I used an elevated shelf to allow for double the storage space.  There is a basket stored behind this with extra grains so that I can refill canisters when I need to.


The next shelf stores 2 baskets.  The blue one is my son's snack basket and the other has our miscellaneous items.


This shelf has all of out grains, pastas and baking supplies.  The 3 canisters behind the front canisters are flour, sugar and oats.  I store them behind because they are less frequently accessed.  There are 2 blue plastic bins behind the canisters that hold all of my baking supplies like vanilla, colored sugars for cookies and cupcakes, cocoa, brown sugar, baking powder etc.


The next shelf is my open air basket with potatoes and onions and the bottom shelf I store all of my Christmas cookie tins.  Below you will see pictures of what the pantry looks like after the makeover!


 I hope this post has inspired you to work with whatever budget you have and encourages you to use organizational supplies that you have around your home.  If you do have to purchase supplies please check out your local dollar store, Walmart and Michael's.  All of these stores have good quality organizing supplies at reasonable prices.  Happy Organizing!!

Sara

Saturday, April 11, 2015

Battery Organization

Do you ever have trouble finding batteries when you really need them?  Don’t know what you have in stock and what you need to get at the store on your next visit?  Do you know how to store your batteries so they can have the longest life?
I used to store our batteries in a drawer in the packages that they were in when I bought them.  Not that my system was a bad system but when searching for batteries, I never knew what I really had in stock.  


I decided it was time to try something different.  The first thing I did was purchase a tackle type storage box from Staples.  I chose this particular box because it has a removable tray inside with separate compartments to store each different type of battery. 


The first thing I did was make labels with my Brother's P-Touch label maker for each type of battery that I would be storing in the box.  This way each type would be stored in it's own compartment.


I organized the batteries by placing one type of battery in each compartment.  Now I know exactly how many batteries I have of each type and I don’t have to dump them all out in search for a particular type.


Here are a few facts about how to store batteries and get the most life out of them.

1.  Batteries should be kept in a cool place but never frozen.  It was suggested by one site that you could store them in the refrigerator as long as you keep them in a sealed plastic bag to prevent condensation.    Another site said to avoid both the freezer and refrigerator all together. Summary:  cold and/or wet batteries do not operate at full strength and warm batteries have a shorter lifespan.  Ideal weather:  59 degrees at 50% humidity. 
2.  Keep their negative and positive ends away from each other to keep them from conducting idly. 
3.  Store new and old batteries in separate containers–old batteries near new batteries will shorten the new batteries’ life.  

Happy Organizing!!!

Sara


Tuesday, March 24, 2015

20 Organizing Tips!

In this post I will be sharing 20 organizing tips for organizing everything from your kids crayons to Christmas ornaments!  I love learning new organizational tips and tricks and many of these I had never thought of!  Enjoy!


For you on-the-go moms use an empty baby wipe container to store crayons, art supplies and even snack while traveling with your little ones in tow!!


I used this method of shower curtain hooks for hanging my scarves but for all of you moms that have boys this is a great method to store all of their baseball caps!


I loved this idea of using wire hangers to fold into hanger hooks for all of your flip flops!


For all of you that have cute, bright laundry rooms I love this idea of hanging your ironing board on this wall mount.  You can store it right behind the door so that it is out of the way when you aren't using it.


Magnetic strips are great to hang inside of your medicine cabinet to store your tweezers, nail clippers and metal hair clips.


I love these hanging door storage pockets.  They come in all sizes and there are endless ways to use them as storage.  This one is hung inside of the laundry closet and stores all of the cleaning products.


I love using glass jelly jars to store office supplies.  I love this idea of storing colored pencils in rainbow order (swoon) and placing the jars in a large wooden tray.


I use this method at our house for battery storage.  This is a plastic tool box and it has separators that can be adjusted depending on the size batteries you need to store.


I discovered this idea while reading Real Simple magazine!  Use large marshmallows in your brown sugar container to prevent the sugar from hardening.  Brilliant!


Use a mesh laundry bag attached to the inside of the dryer door to store your sneakers while drying.  This was genius!  I cannot stand the clanging and banging of sneakers in a dryer!  Perfect solution!


Use a thick rubber-band and wrap it around the can of paint as a drip catcher.  This will prevent all that mess on the outside of the can.


No picture hooks?  No problem!  Use a coke tab to hang a picture without fear of scratching up your walls.


I rarely send cut up apples in my son's lunch because they brown and he will not eat them.  This is a great idea to slice it and then wrap it up with a rubber-band so it will stay fresh!


I loved this idea and I wished I had known about it when my guy was still in a high chair.  A simple Command hook placed on the back of the highchair to hang all of your little one's bibs!


There have been so many times when our electricity goes off and we are fumbling around for a flash light.  Velcro a flashlight right to the side of your electric fuse box for easy access!


Use egg cartons to store all of your Christmas tree bulbs!  Genius!


Use shower hooks and a towel rod to store your necklaces.  There are so many pretty shower hooks and towel rods that this display would look good on a wall in your room or bathroom!


Couldn't get through this post without some wine!!  Use frozen grapes on warm days to chill your wine.  As a wife of a Wine Consultant ice cubes are not allowed so this is a great alternative!  


Last but not least, I love this idea of storing each set of sheets in it's own pillowcase!  How have I never thought of this?


Thanks for stopping by the blog!  I hope you got some great ideas for organizing your home while you were visiting!

Happy Organizing!

Sara

Wednesday, March 18, 2015

Emergency Pouch for Your Car

In this post I outline another mini-organization challenge~Emergency Pouch for Your Car.  This pouch contains everything I usually need but most of the time never have in my car.  So I decided to bite the bullet and put this kit together and I am so glad that I did!  It has been great and I find myself needing at least one of the items daily as I am running around to and from work, to carpool and running errands.  


I decided that most, if not all the items that I need for this challenge could be purchased at Target (darn, another reason to go to Target;)  I love the Orla Keily line of pouches, makeup bags and travel bags and I got super lucky and found this cute travel case with a car fabric!  It is the perfect size for all of the items that I will need to store in the pouch.  You can use any pouch you have on hand for this challenge.  It can be as big or as small as you like depending on what you will store in the pouch.  I really liked the size of this pouch because it fits perfectly in the console of my car.


This is what the pouch looks like with everything in it.  It is stuffed to the gills!!


I purchased most of these items in the mini-travel supply section of Target while some of the items I already had at home.  The list below is all of the items I purchased and the cost of each item.


  1. Orla Kiely Travel Case, $9.99
  2. Lint Roller,  $.99
  3. Kleenex, $.49
  4. Band-aids, $.49
  5. Vasaline Mini lip balm, $1.29
  6. The Honest Company Hand Spray Sanitizer, $1.99
  7. Tylenol, $1.99
  8. Hair bands, had at home
  9. Ricola Throat drops, had at home
  10. Children size scissors, had at home
The cost of this project for me was $17.23.  If I would have used a pouch that I already had at home it would have only been $7.24!!  I had pouches to use at home but I just couldn't resist the Orla Kiely Car pouch!  I keep the pouch stored in the console of my car for easy access.  I hope that this post inspires you to put together an Emergency Pouch for your car. 

Happy Organizing!

Sara 


Friday, March 13, 2015

Coat Closet Organization


The coat closet tends to be a dumping ground in our house for coats, hats, shoes, scarves and gloves as we come in and out of the house.  This closet has always been a challenge for our family.  Our coat closet is small so when I decided to re-organize the closet I knew that I had to only store things that we use for the particular season we are in.  I will store off-season items in bins that will be stored in our basement.  We are between seasons here, still cold enough most days for coats in the morning with hats and gloves.  The pictures below is the closet before the redo.  We were just storing all of our scarves, hats and gloves on the top shelf which was a big pile of mess!  I had miss-matched hangers and my son's things never quite make it on a hanger, all the items on the floor are his.


 The first thing I did was to remove everything from the closet.  I vacuumed the floor and baseboards and wiped down the top shelve with a dry cloth and multipurpose cleaner.  I then found 2 baskets that I had that fit perfectly side by side on the top shelf of the closet.  I decided to store hats in one basket and gloves in the other.


I then found wooden hangers that I already had and hung all of our current coats leaving a few empty hangers so that we will be able to hang the coats of any guests that visit.


I found this cute over the door 10 hook piece at Big Lots for $3.50!  I love it and it fits perfectly inside the door.


I can store all of our scarves on these hooks in the colder months and during the warmer months we can store baseball caps, umbrellas and even flip flops on the hooks.


 Sorry for the awkward angle, we have tight hallways so this was as good of a picture that I could get.  The floor is clear except for a folding step ladder.


 I really think baskets and over the door hooks are great organizing items for closets.  They allow you to separate and store like items and allow you to utilize as much space as possible which is important since most hallway and coat closets are on the smaller side.  This project only cost me $3.50 for the over the door hooks.  I used what I had as far as the baskets and the hangers.  Often times small organizational projects like this are very low cost because you can use items that you already have in your home.  I hope this simple organizing project shows readers how easy and budget friendly organizing can be.

Happy Organizing!!

Sara